– Settings
A reference page for the Seating Charts editor, covering one of the building blocks you use to construct your venue layout. Combined with the other building blocks (seating groups, standing areas, tables, decorative elements, text, background images), this is what lets you draw any venue as a fully interactive, click-to-buy seating chart.
Every great seating chart starts with one essential step — setting the stage.
The Settings panel is where you name your chart, link it to an event, and decide how big your virtual canvas will be. Think of it as laying the foundation before you start placing chairs and tables.
Opening the settings panel
Once you’ve opened the seating chart editor, you’ll see several icons in the toolbox (top right corner).
Click the first icon to open the Settings panel. This is usually the first thing you’ll do when creating a new chart, since all other elements depend on these basics.
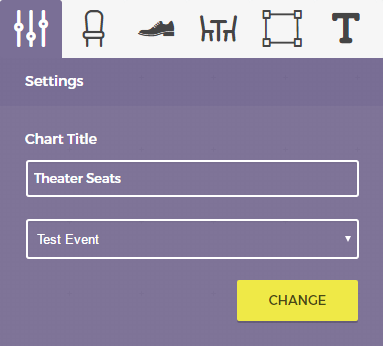
Chart name
Give your chart a name that helps you easily recognize it later — something descriptive like “Main Hall – Evening Show” or “Outdoor Arena – Day 2.”
This name won’t appear to your customers; it’s only visible in your admin area to help you stay organized when managing multiple charts.
Connect to an event
Under Event, select the event this seating chart belongs to.
Every chart must be linked to an existing event in order to function properly — otherwise, Tickera won’t know which tickets to associate with which seats.
Once connected, this chart will be available on that event’s page, allowing your customers to pick their seats when purchasing tickets.
Single seating chart cannot be assigned to multiple events.
Next step
Your chart now has a name and links to an event — perfect foundation. Continue with adding seating groups, tables and standing areas.
Pro tip
If you’re planning a particularly large or complex venue (like multiple floors, zones, or arenas), consider splitting it into several smaller seating charts instead of one giant one.
It makes chart creation faster, page loading smoother, and managing tickets far easier.
For details, see Creating a large and elaborate seating chart layout.
Related
Was this article helpful?
Yes — great. No or partially? Tell us what was missing — we read every message and use it to improve these docs.