Increase email deliverability with Mailgun
Spam emails are the pressing issue in an online world for years. And because of this, email service providers became quite picky about the origin of the emails and are often considering emails such as the ones sent from your WordPress website as spam and in some cases they block them entirely. And this is one of the most common issues that any WordPress website admin encounters. It can drive you nuts as there's little you can do on your side to prevent this. So, if you're in the event ticketing business and email deliverability is the highest priority for you to make sure that tickets your customers purchased reached them, it is time to pull out a big gun.... or in this case - Mailgun.
Mailgun - what is it?
In the simplest of terms, it is an email engine and the answer to your email prayers. Although it is not the easiest thing to set up, it is well worth the hassle and will provide you with a piece of mind once you make it work. In their free tier, Mailgun will allow you to send 5000 emails per month for three months. Even after that, they won't break your bank as their pricing plans are quite flexible and include the ever popular "pay as you go" option which allows you to pay only for the emails that you have sent and nothing more. Sounds good? Yeah, we think so too. So, let's see now how to set this bad boy up and make your emails purr like a happy kitten.
Creating Mailgun account and setting up the basics
First things first: head over to Mailgun website and register your account by clicking the Start Sending button. You will be met with rather simple registration form where you will also need to provide you credit card credentials even for the free account (you will find an explanation for this on that very page).
![]()
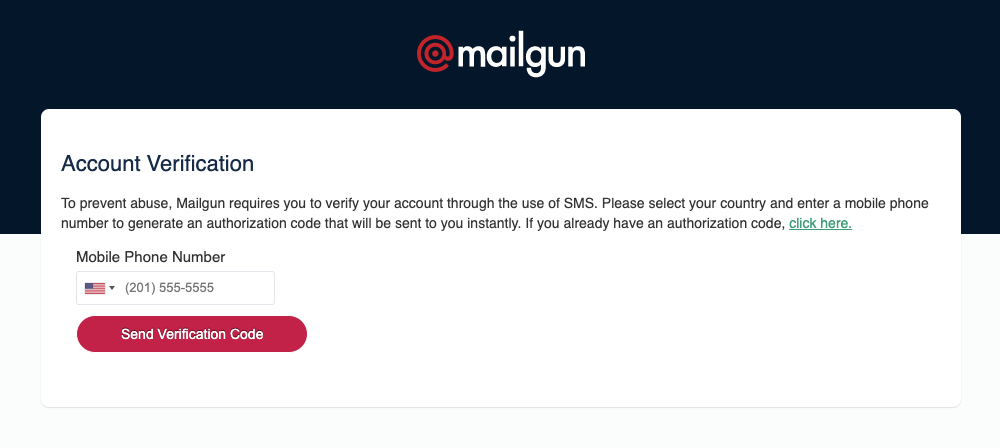
As soon as you have finished registration, you will need to verify your email address by clicking the link that you will receive to your email once you finish the registration. This will lead you to the page where you will need to enter your mobile phone number to which you will then receive a verification code that you should enter on the next page.
Adding your domain
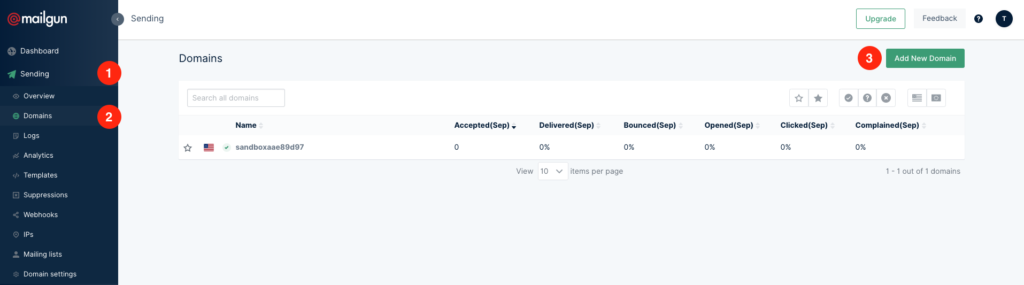
Once you have verified your account and logged in to your Mailgun dashboard, in the menu on the left, expand the Sending item (1) and then click Domains (2). On the page that will appear, click the Add New Domain (3) button on the top right.
On the Add your domain page you should enter the domain of your website which you would like to use Mailgun with. They recommend using a subdomain for this so we will go with that and enter to the Domain name field a subdomain that we would like to use for our emails. For example, if your website is located on my-website-domain.com then you can enter something like mailgun.my-website-domain.com
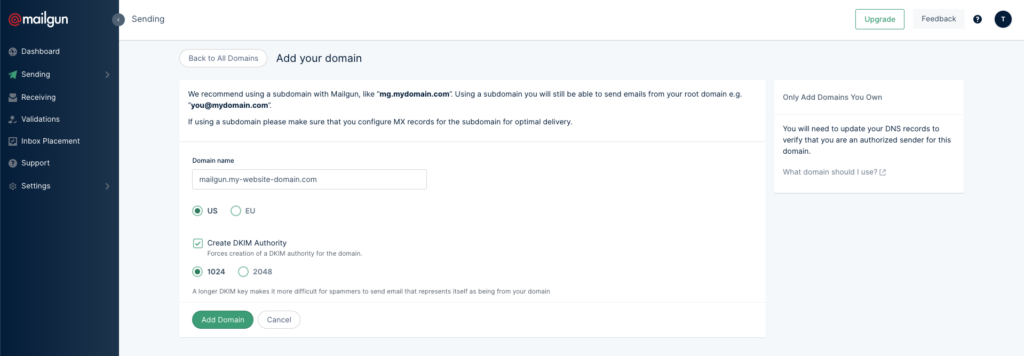
Below that field, you should select which region your website is hosted on and there are only two choices: US or EU. In a nutshell, if your website is hosted anywhere outside of the European Union, simply leave US and you're good.
You can leave the rest of the options as is and simply click the Add Domain button at the bottom.
Verifying your domain
In order for Mailgun to verify that you are indeed registering your domain, you will need to add certain DNS records for your domain using the dashboard of your hosting service provider or the dashboard of the domain provider. However, as each of service providers have different interfaces and layouts, it's quite impossible to showcase how and where exactly you should do this. But, if you're unsure or simply don't feel comfortable doing this yourself, you can contact your hosting service provider or domain provider and ask them to add these records for you (you should copy and past all the content from the Overview page and send that to them).
Setting up Mailgun with your WordPress website
There are quite a few WordPress plugins that will make configuring Mailgun with your website a breeze. In this solution, we will use currently the most popular one - WP Mail SMTP which is free and can be downloaded from here. Once you install this plugin, you should click the WP Mail SMTP menu item and then click Settings which will lead you to the settings page of this plugin.
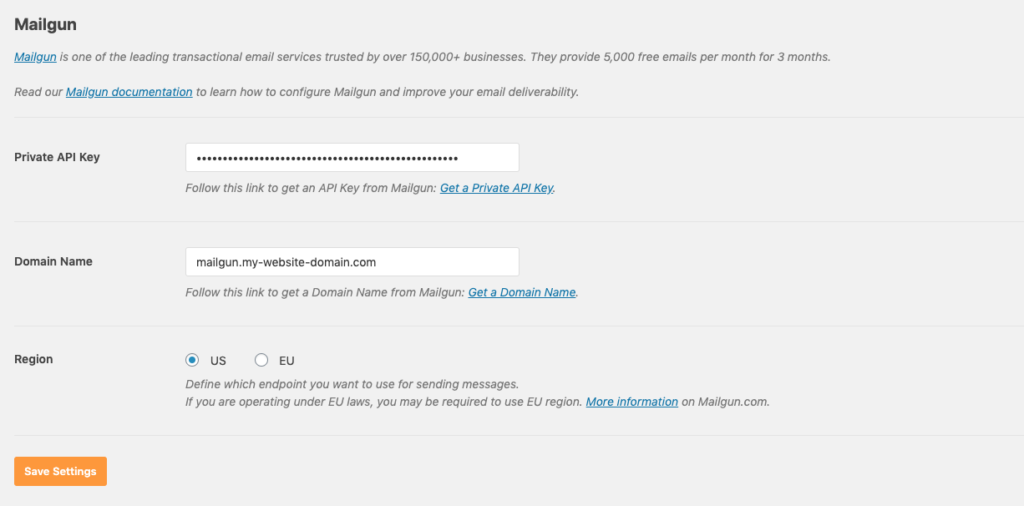
On the settings page, you will notice that this plugin supports quite a few mailing services but since we will be using Mailgun, you should click the Mailgun icon.
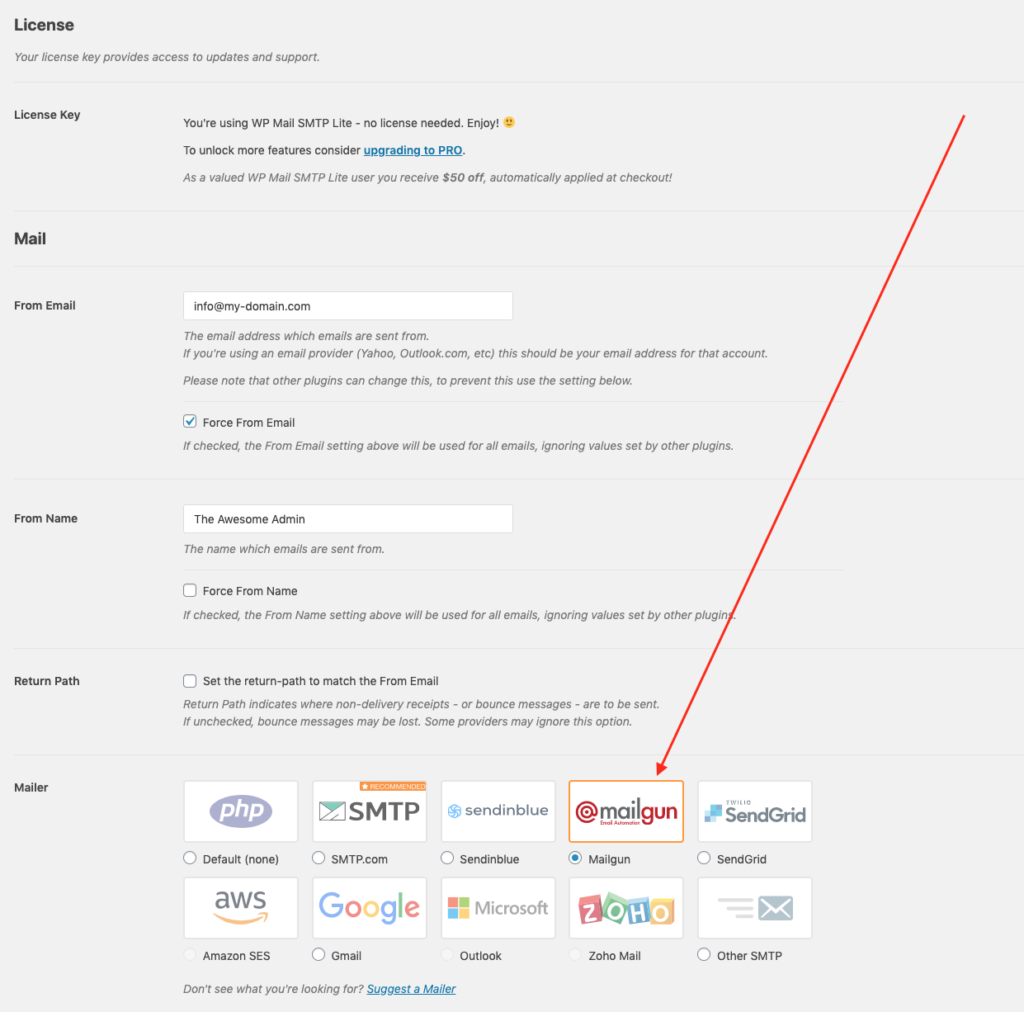
As soon as you click this icon, a few options will appear below. You will be asked to enter your Private API key, your Domain Name and to select your region.
Private API key can be obtained by logging in to your Mailgun account, then clicking the circle icon with your initial in the upper right corner and then selecting API keys from there.
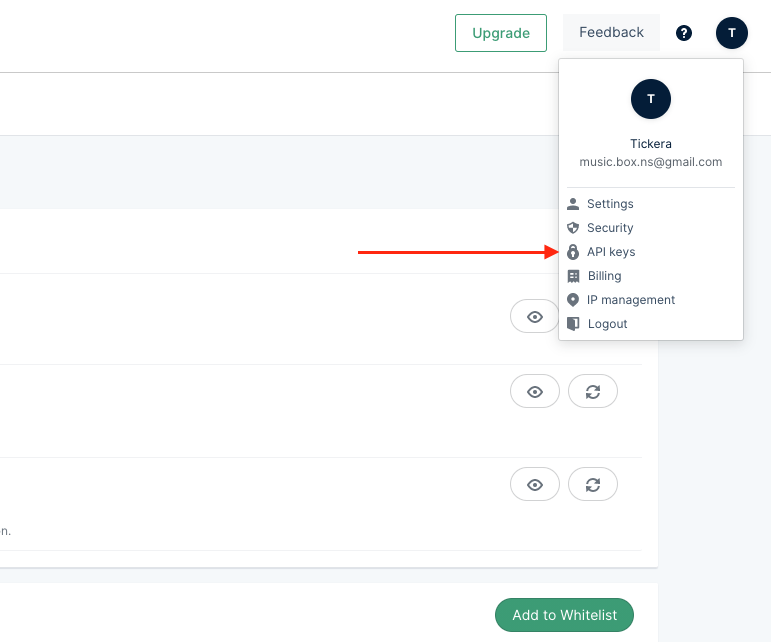
On the Account Security page, you should be able to see Private API key value that is currently hidden but you can reveal it by clicking the "eye" icon on the right.
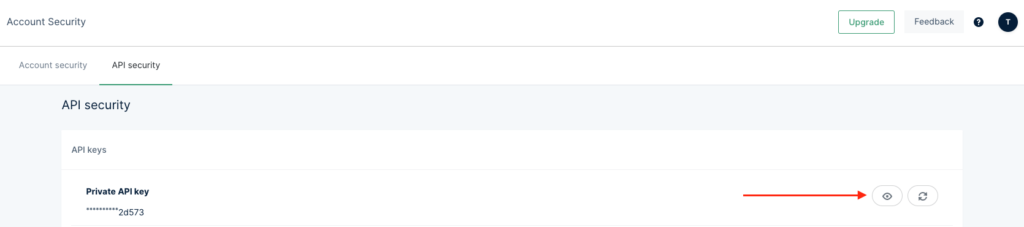
Once revealed, copy the Private API key, and paste it to the field with the same label on your website, within the WP Mail SMTP settings.
The Domain Name field should be filled with the subdomain that you have elected to use with your Mailgun account and which you have configured your DNS records for.
Lastly, the region selection should match the region you have selected within your Mailgun account.
After this, you can simply hit that orange Save Settings button and you're finally good to go.
Finally, to make sure things are working correctly, head over to the Email Test tab of WP Mail SMTP plugin and send a test email to your email address.
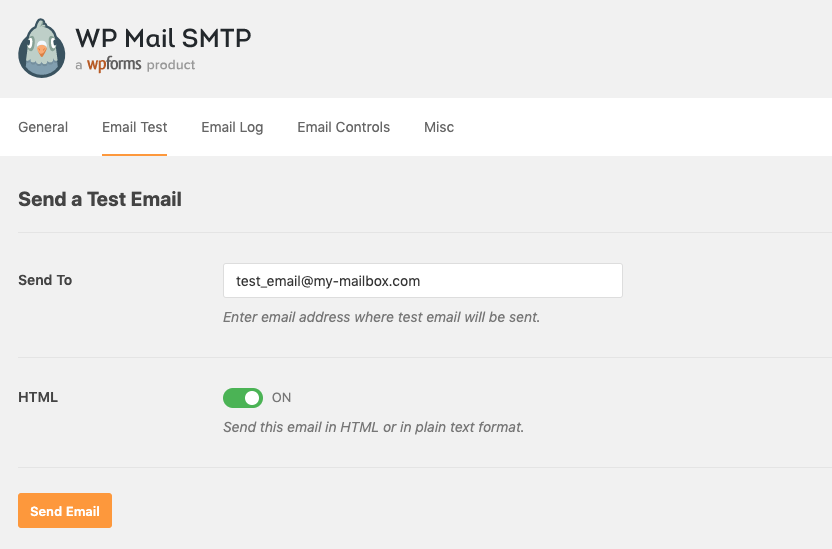
If you receive your email, congratulations, you have successfully configured your website to use Mailgun for delivering emails sent from your website.
Whew... that was a tough one. Was it worth though?
Most definitely, YES. With Mailgun set up correctly on your website, you won't have to worry ever again that your emails will be ending up in spam folders or not being delivered at all. And even if that occurs, you have someone to blame now... just kidding. In the unlikely case of some emails not being delivered, you have detailed logs in your Mailgun dashboard for each and every email that was sent from your website where you can see whether it was delivered and if not, the possible reasons for that and plenty of other useful information.
Important note:
It might happen that once you set Mailgun and start delivering your emails through it, all of a sudden Download links for the tickets will stop working, meaning: will not resolve correctly. Now, this is not something that is specific to Tickera directly as any of the URLs in the body of email will share the same problem, not just Tickera ones. This problem originates from Mailgun's click tracking and is, accordingly, resolved on their end. To find out step by step instruction on how to resolve this, check their documentation here.