PayPal Pro
PayPal Pro keeps the payment form on your own site — no redirect to PayPal — for a smoother, more brand-consistent checkout. Requires a PayPal Pro merchant account (not the basic Personal/Business PayPal), which has additional approval requirements and monthly fees. For the simpler redirect-based flow, see PayPal Standard.
To start using the PayPal Pro payment gateway, you’ll need to setup a Verified PayPal Premier or Business Account. If you have an existing Personal, you can upgrade your account to a Premier or Business account. To do that, first navigate to your profile icon and select Profile and settings (1) like the picture below describes:

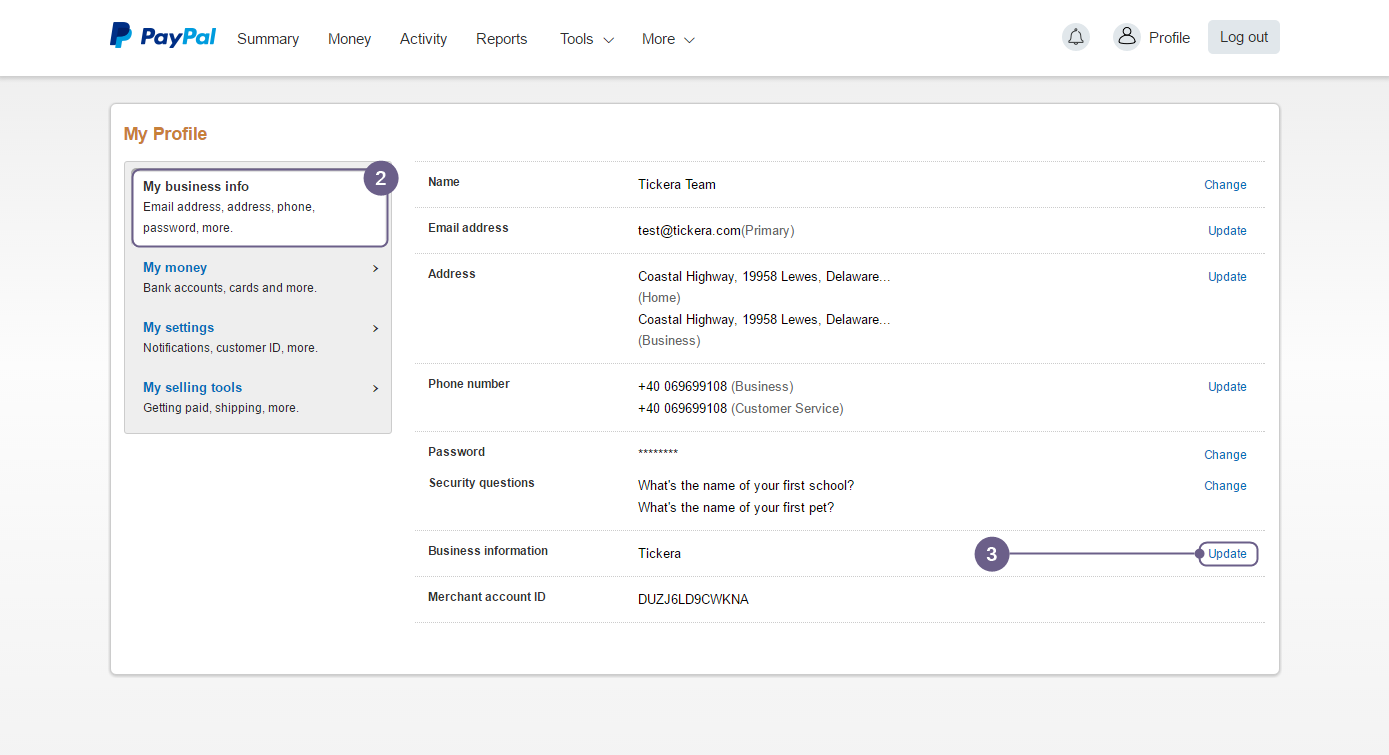
Next, head to My business info on the left (2) and within Business information row, click Update (3)
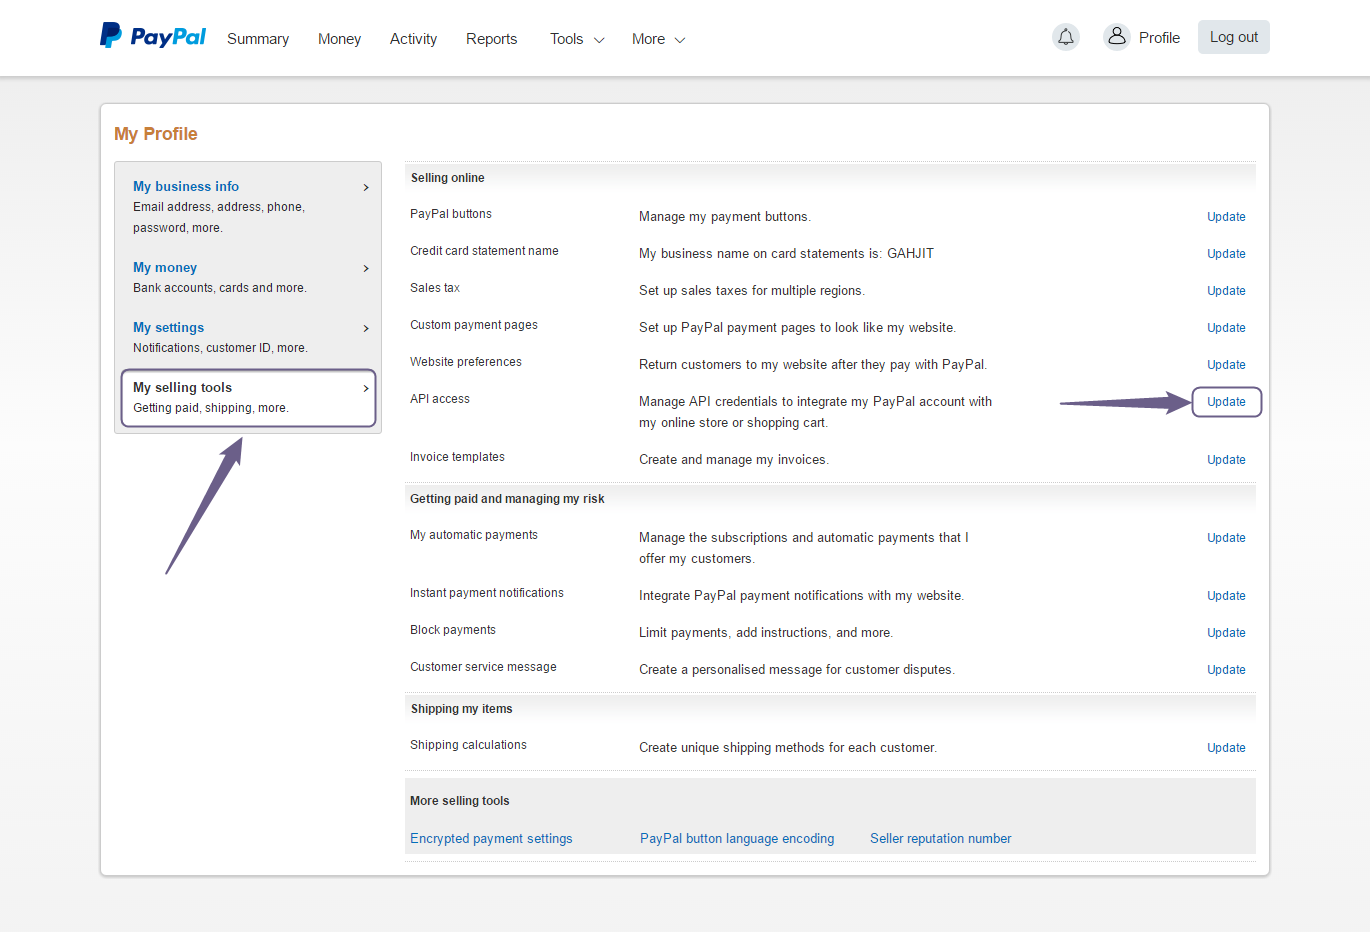
When you have your verified account setup, you’ll need your API details to enter into Tickera PayPal Pro settings. To get your API access information head to My selling preferences and locate API Access row:
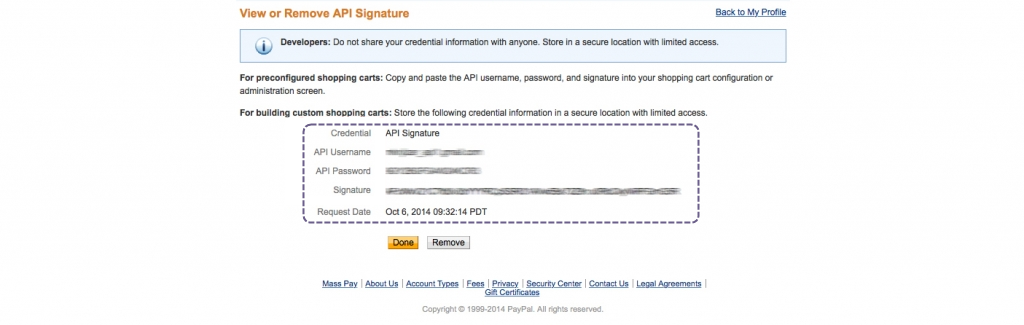
Click Update, now Choose Option 2 – Request API credentials to create your own API username and password and lastly Choose Option 1 – Request API Signature and click Agree and Submit.
Now Copy the username, password and signature that get provided and then click Done.
Then input the details from the previous step into the Tickera > Settings > Payment Gateways > PayPal PRO settings screen where requested:
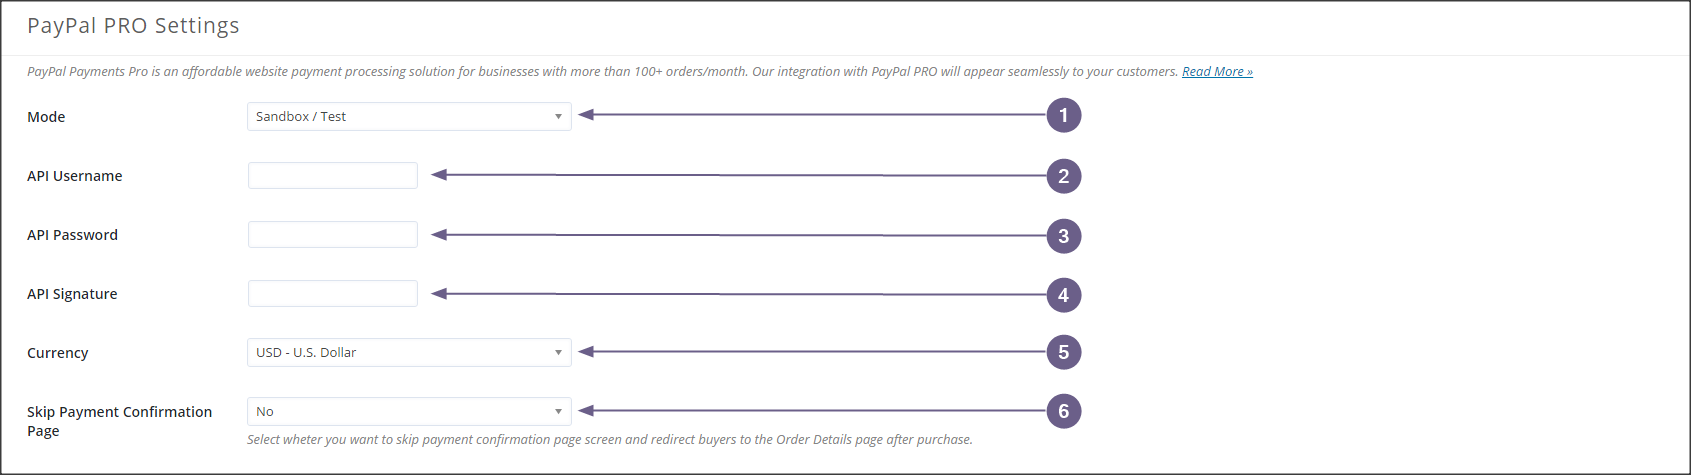
- Mode – From this dropdown menu you can choose Sandbox/Test or Live mode.
- API Username – enter an API username previously obtained from your PayPal account
- API Password – enter an API password previously obtained from your PayPal account
- API Signature – enter an API signature previously obtained from your PayPal account
- Currency – select a currency you would like to use and make sure it matches global currency set in the General Settings
- Skip Payment Confirmation Page – select whether to skip payment confirmation page or not
Related questions
Was this article helpful?
Yes — great. No or partially? Tell us what was missing — we read every message and use it to improve these docs.