CSV Export
The CSV Export add-on dumps Tickera attendee and order data into spreadsheet-friendly CSV files — name, email, ticket type, custom form responses, check-in status, order amount, the whole shebang. Useful for handing attendee lists to volunteer coordinators, importing into a CRM, building post-event analytics in Google Sheets or Excel, sending sponsor-specific attendee lists, or any other “I need this data outside of WordPress” workflow.
The CSV Export add-on helps you extract detailed attendee and order data from Tickera and put it to work — for reporting, analytics, attendee management, or third-party integrations.
The CSV Export tool lives in Tickera’s main menu, right alongside your main event management tools.
Exporting your data
Head over to Tickera -> CSV Export, and you’ll find a simple interface divided into logical sections that let you control what data you want to include in your export.
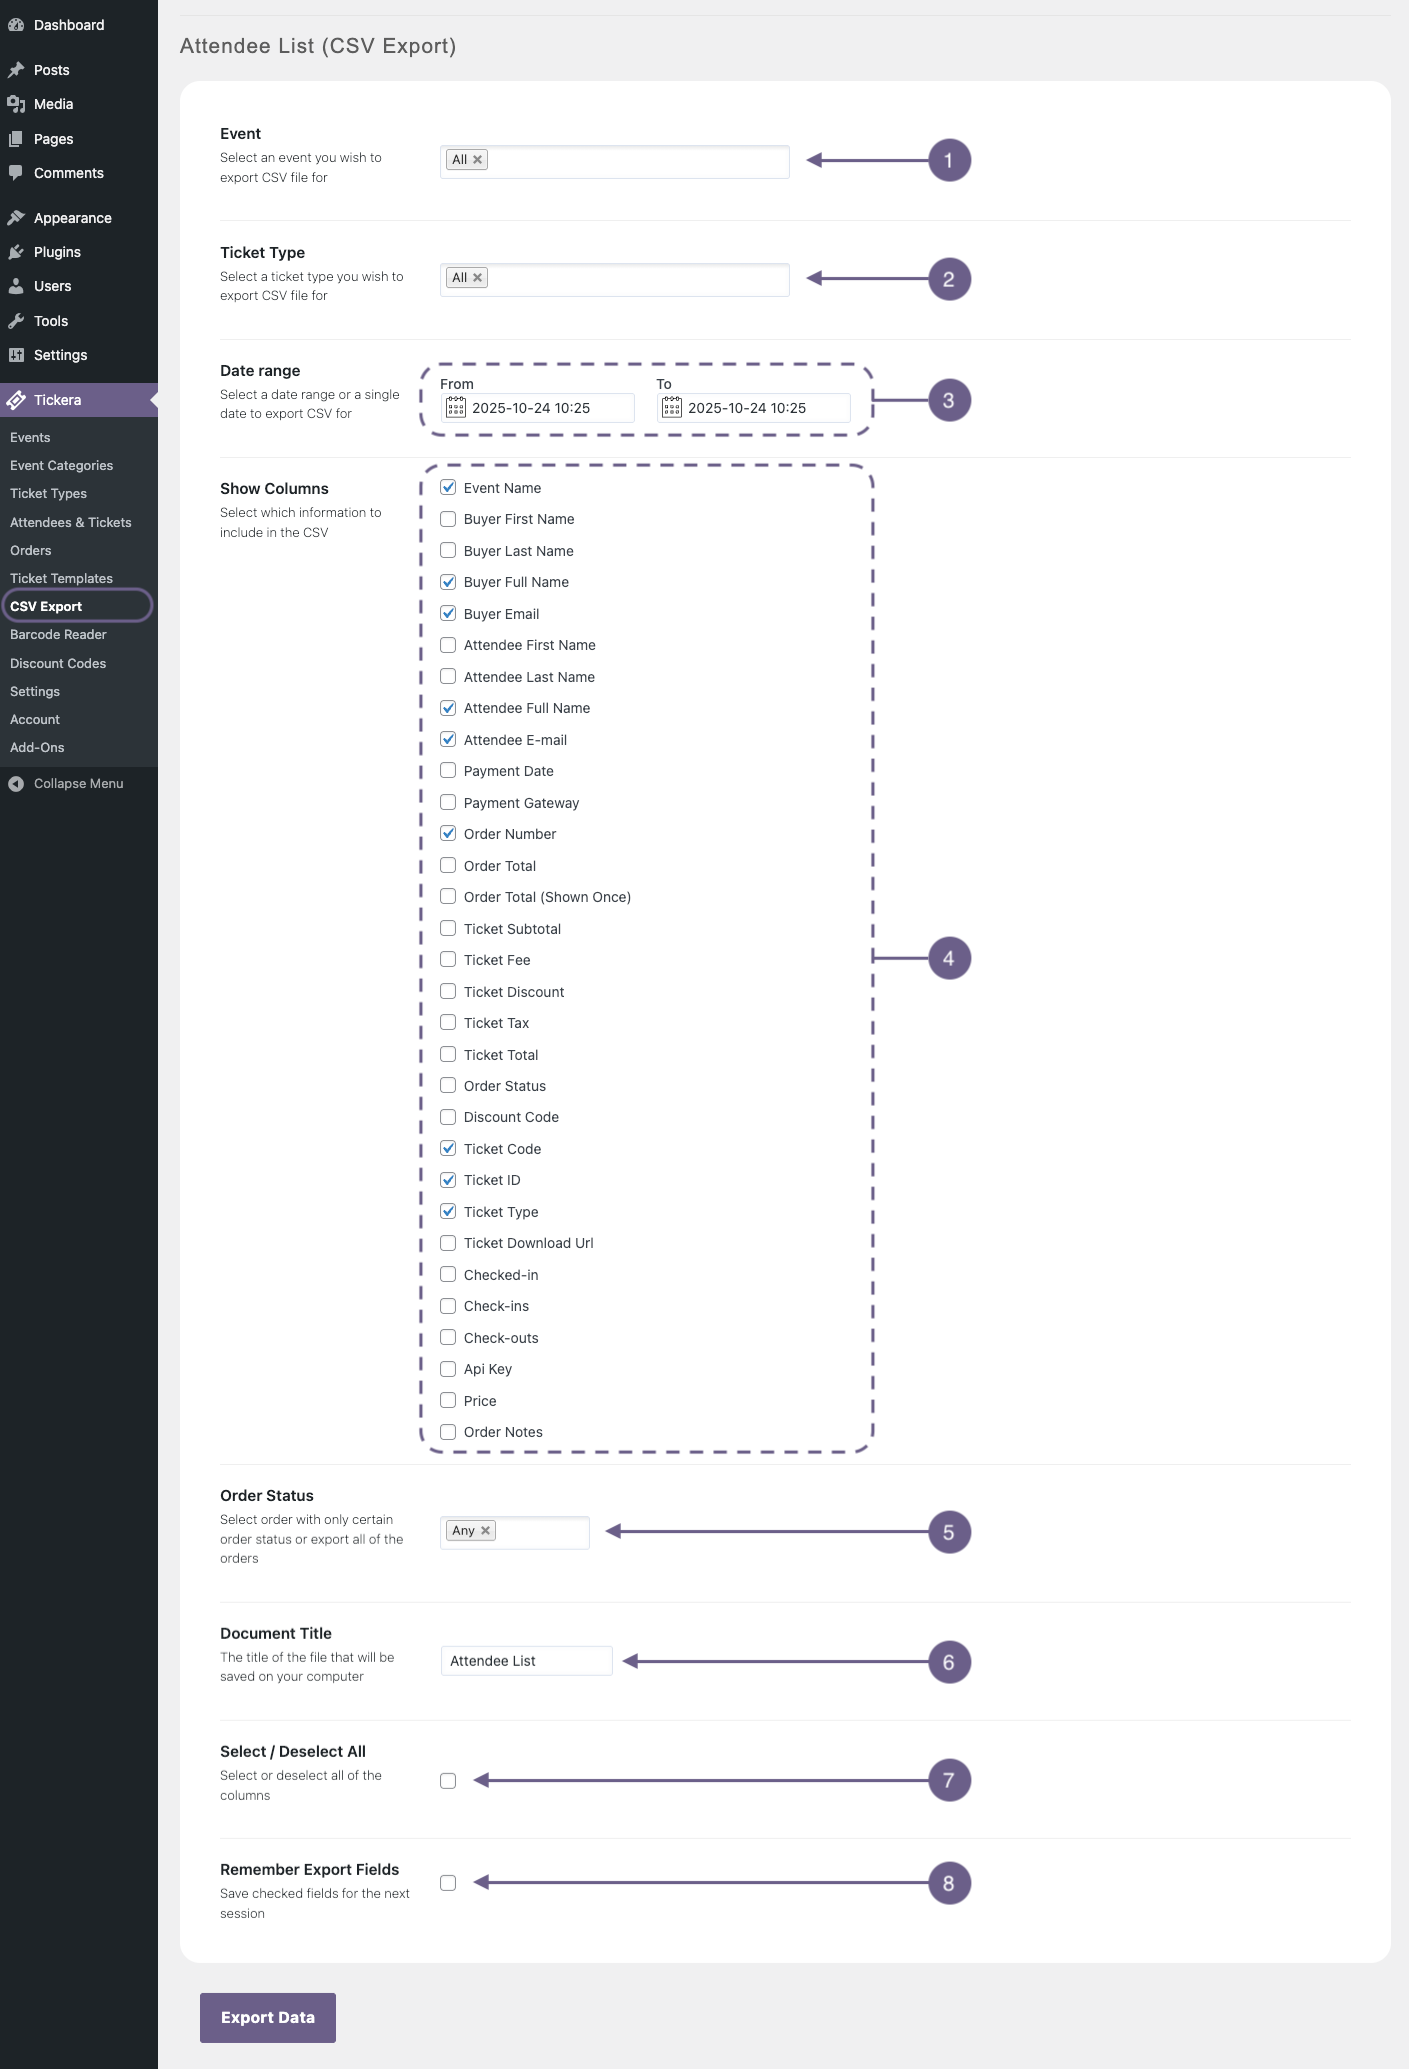
Let’s walk through each option:
- Event – Choose one, multiple, or even all events to include in your export. This is handy when you’re running multiple shows, festivals, or workshops and want to see everything in one report.
- Ticket type – Select one or more ticket types (like VIP, Early Bird, or General Admission). Leave it blank to include every ticket type from your selected events.
- Date range – Filter your report by the date range when the orders were created. You can, for instance, export only attendees who purchased tickets within a specific sales window.
- Show columns – Tickera lets you choose exactly which data columns to include. You can mix and match fields such as buyer names, attendee details, payment gateways, order numbers, and totals. If you’re using the Custom Forms add-on, all the extra fields you created during checkout will appear here too.
- Order status – Filter the export by order status — such as completed, pending, or refunded. It’s great for analyzing sales progress or following up on incomplete purchases.
- Document title – Type the name you want for your exported CSV file. The download will use this name when saved to your computer.
- Select / Deselect all – Quickly toggle all the available columns on or off. Perfect for starting from scratch or fine-tuning your export setup.
- Remember export fields – Save your column selection for the next time you open CSV Export. This saves a lot of time if you export similar reports regularly.
When you’ve set everything up, click Export Data. Tickera instantly creates and downloads your CSV file.
Working with your csv files
Your exported CSV works in almost every spreadsheet or database tool, including:
You can also import it straight into your CRM, newsletter, or analytics platform. CSV files are universal, which makes them ideal for cross-platform data sharing and automation.
Why this add-on matters?
The CSV Export add-on turns your event data into insights. Use it to:
- Track ticket sales and attendance for one or more events
- Spot sales trends, like when most tickets are purchased or which ticket types sell fastest
- Prepare performance reports for sponsors, venues, or internal teams
- Sync buyer and attendee data with mailing or CRM tools for personalized follow-ups
- Compare sales data with payment or accounting records
To see what’s possible, check out our detailed blog post: How to Utilize CSV Export add-on Like a Pro
Common export scenarios
Here are a few ways you can use CSV Export in your day-to-day workflow:
- Create a guest list for check-in
Export attendee names, ticket types, and check-in data to prepare a list for your front-door staff. It’s a simple way to match pre-registrations with real attendance. - Sync with your mailing list or CRM
Export only buyer names and emails to build mailing lists for pre-event updates or post-event thank-yous. Works great with tools like Mailchimp, Brevo (Sendinblue), or HubSpot. - Prepare sales and tax reports
Include columns like totals, taxes, and fees, then sort and group them in Excel or Sheets to generate clear financial summaries for your accountant. - Compare event performance
Select multiple events at once to see how each performed. - Analyze attendee behavior
Combine CSV data with your analytics tool to identify purchase patterns — like which days drive the most ticket sales or how early-bird campaigns affect conversions. - Back up your data
Export event data after every event or once a month to keep offline backups. This is also a smart safety measure before migrating your site.
Pro tips
- Select multiple events to build a combined performance overview.
- Turn on Remember export fields if you often generate similar reports.
- Combine Date range and Order status filters to focus on specific time periods or transaction stages.
- When editing your CSV in external tools, always re-save it as UTF-8 encoded to prevent character display issues.
Troubleshooting
If something doesn’t look right, here are a few quick checks that usually solve the problem:
- CSV file doesn’t download
Make sure your browser isn’t blocking downloads or that no ad/script blocker interferes. Try another browser or incognito mode to test. - Empty CSV file
This usually means the filters (event, date range, or order status) returned no matching data. Try broadening your filters or selecting “All Events.” - Missing columns or wrong data
Verify that the correct fields are checked under Show columns. If you recently added new fields with Custom Forms, make sure they’re enabled there too. - Garbled characters (�)
Your CSV is probably saved in a non-UTF-8 format. Re-save the file in UTF-8 encoding (most spreadsheet programs have this option when exporting). - Slow export
If you have a large number of orders or events, try filtering by date or event to reduce the dataset.
Related questions
Was this article helpful?
Yes — great. No or partially? Tell us what was missing — we read every message and use it to improve these docs.