– Standing area
A reference page for the Seating Charts editor, covering one of the building blocks you use to construct your venue layout. Combined with the other building blocks (seating groups, standing areas, tables, decorative elements, text, background images), this is what lets you draw any venue as a fully interactive, click-to-buy seating chart.
Not every event needs chairs. Sometimes it’s a pit, a dance floor, or a wide-open lawn where attendees can freely move around. That’s where the Standing area tool comes in.
This option lets you create areas that sell tickets without individual seat assignments, while still keeping them part of your visual venue layout. Think of it as a big section labeled “General Admission” or “Fan Pit,” where everyone with the corresponding ticket can enter.
Creating a standing area
To add one, click the standing figure icon in the toolbox.
This opens the Standing area pane on the right-hand side.
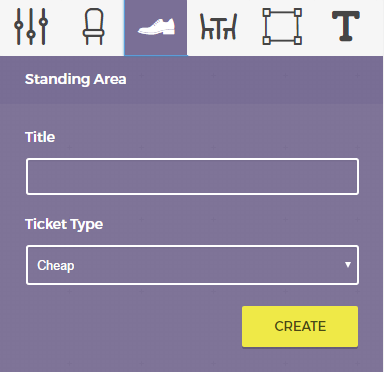
Enter a title for your area (for example, “Fan Pit” or “General Admission”) and then choose the ticket type you want to associate with it from the dropdown list.
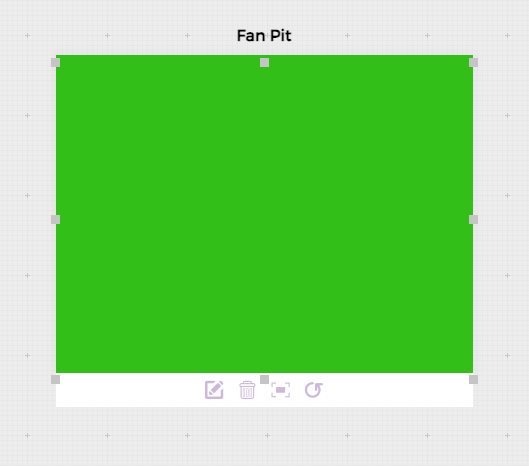
When you click Create, the new standing area will appear on your seating chart canvas.
As soon as you assign a ticket type, the area will automatically adopt the color defined for that ticket type — so it’s easy to distinguish it visually from other sections.
Moving and resizing
Once the standing area appears on the canvas, you can freely move and resize it to match your venue layout.
To resize, hover over the standing area — you’ll see small handles appear along the edges. Click and drag any of these handles to adjust its dimensions. This helps represent your actual standing space proportions more realistically. If you have multiple standing zones (for example, Front Pit and Back Lawn), simply repeat the process and assign each its own ticket type and color.
Editing a standing area
Hovering over the standing area reveals a set of icons at the bottom, similar to seating groups:
- The pencil icon lets you rename or reassign the area’s ticket type.
- The trash icon deletes the area completely.
- The bring-to-front icon (small rectangle) lets you layer the area visually above other elements if they overlap.
- The rotate icon allows you to rotate the area to match your venue’s layout.
Tip: Use rotation sparingly with standing areas — they’re generally rectangular zones, but a slight tilt can be helpful if you’re matching an angled stage or uneven layout.
Pro tip
If you’re mixing standing and seated zones in the same event, make sure to assign different ticket types to each.
This way, customers buying general admission tickets won’t accidentally pick a seat, and vice versa. It also makes your reporting and check-in process far clearer later on.
Creative use cases
Although primarily designed for open-floor standing sections, standing areas can be used in many other creative ways.
For example, they can represent booths or stalls for rent at fairs, expos, or food festivals — each booth being its own standing area.
In such cases, you’d typically create a separate ticket type for each booth and limit its quantity to 1, so each booth can be purchased only once.
To see this setup in action, check out these blog posts:
Related
Was this article helpful?
Yes — great. No or partially? Tell us what was missing — we read every message and use it to improve these docs.